Have you ever looked at a beautiful piece of Designer Series Paper (DSP) and thought, “How can I make this even more me?” That was exactly the spark behind today’s creative challenge! In my latest project, I took the stunning Designer Special Release papers from Stampin’ Up! and added a unique, personal twist by coloring them. Let me tell you, it was such a fun and rewarding way to stretch my creative muscles!
Why Creative Challenges Are a Game-Changer
Participating in creative challenges, like this one inspired by Stampin’ Up!, is one of my favorite ways to step outside my comfort zone. They encourage you to try new techniques, think differently about your supplies, and ultimately create something that feels uniquely yours. Plus, they’re just plain fun! Who doesn’t love an excuse to get crafty and experiment?
Here are a few tips to help you embrace creative challenges and make the most of them:
- Start Simple: If the idea of a challenge feels overwhelming, start with a small change, like adding a pop of color to an element or trying a new fold for a card.
- Use What You Have: Challenges don’t have to mean buying all new supplies. Look at what’s already in your stash and think about how you can use it in new ways.
- Take Risks: Not every experiment will turn out as planned, and that’s okay! Sometimes those “oops” moments lead to the most creative breakthroughs.
- Share Your Work: Sharing your creations with others (in a class, online, or with friends) can inspire even more ideas and build your confidence.
The Project: Two Stunning Cards
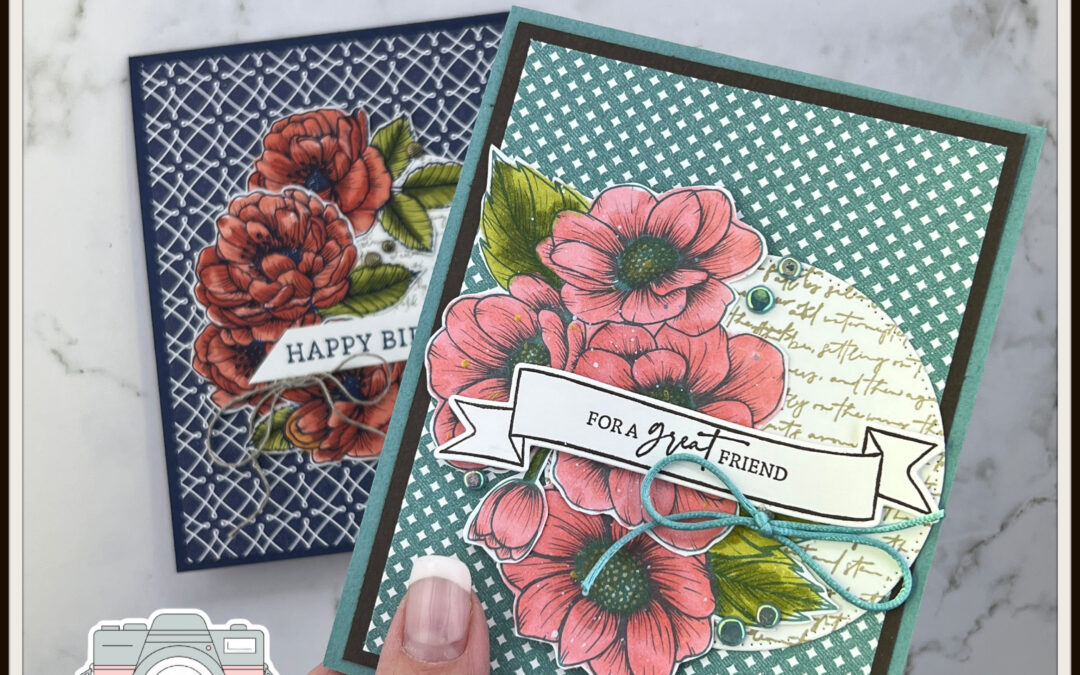
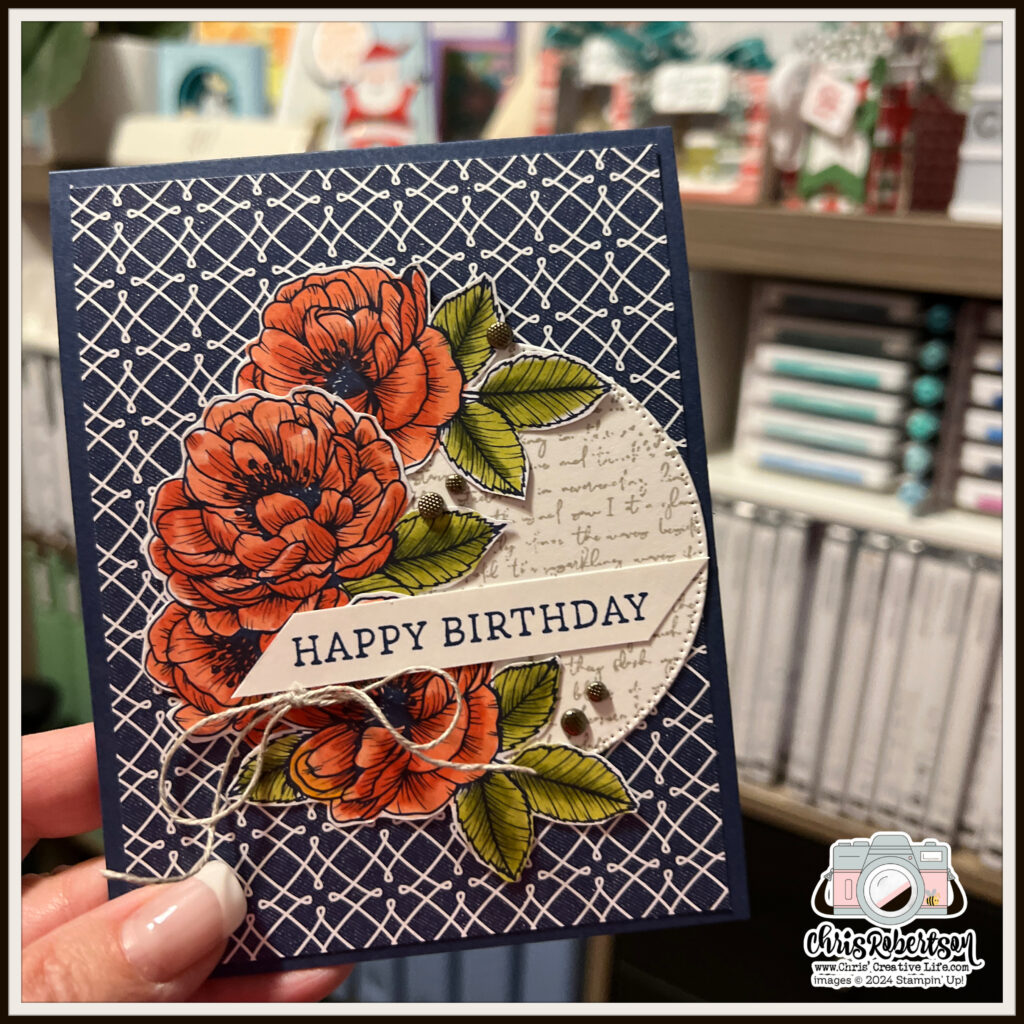
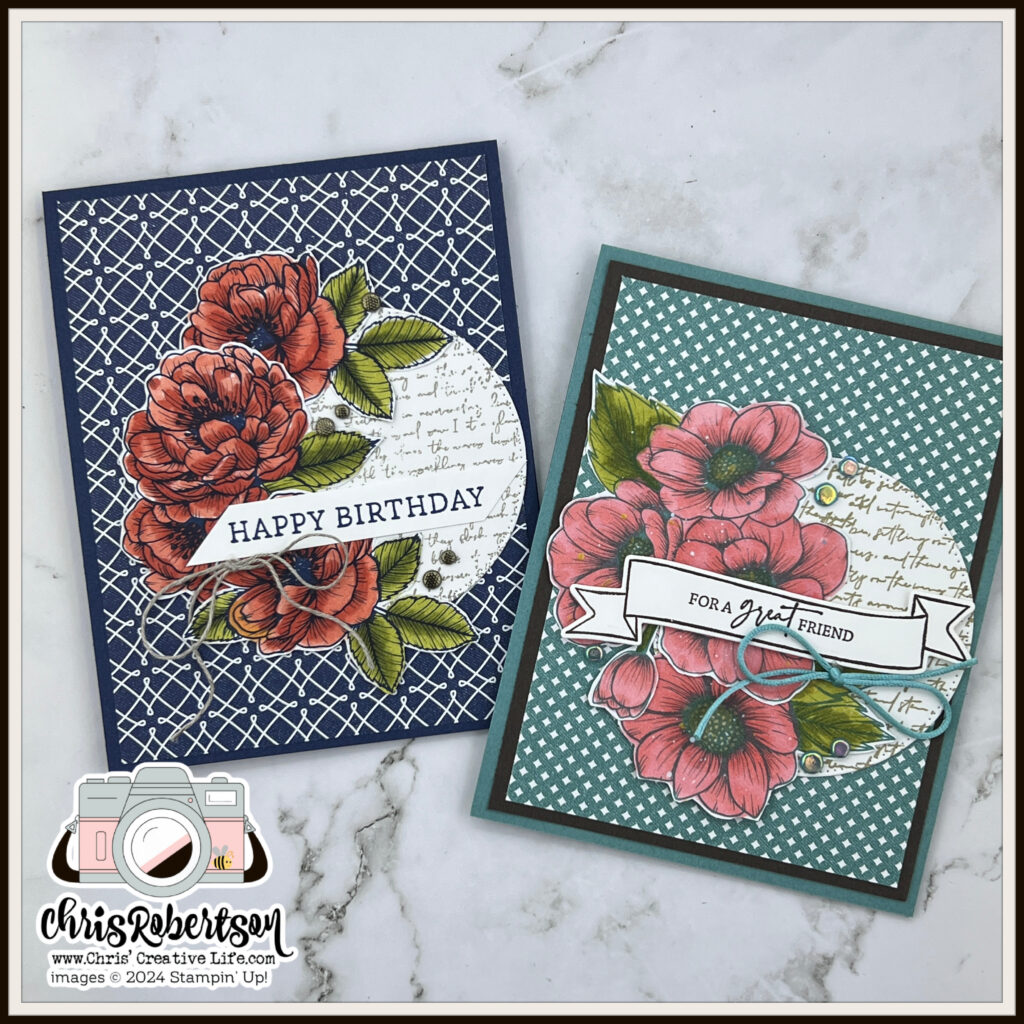
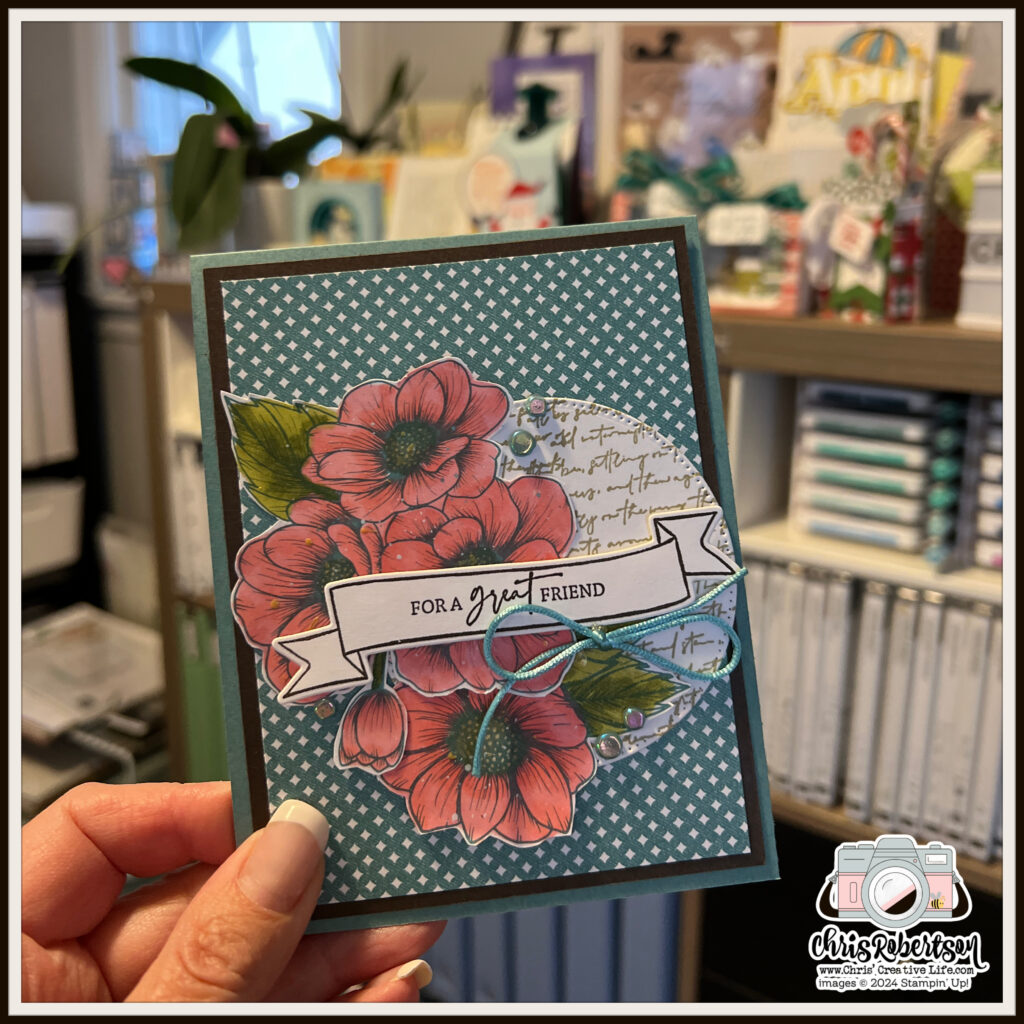
For this challenge, I created two versions of a card using the Designer Special Release papers—one where I added custom coloring and one that let the original design shine. Coloring DSP is such a simple way to make it your own, and it opens up endless possibilities for matching your projects to any theme or mood.
Version 1: This card features bold, vibrant colors added with Stampin’ Blends. I focused on enhancing the patterns in the DSP while still letting its original beauty shine through.
Version 2: In this alternate version, I used a completely different color palette, paired it with new embellishments, and added a few bonus techniques to really make it pop. This approach showcases how you can take the same DSP and create an entirely different look by switching up your tools and techniques.
I’ve included photos of both cards below so you can see the difference for yourself. It’s amazing how much a little customization can change the feel of a project!
Bonus Tip: Why Coloring DSP is a Great Way to Learn About Color
One of the hidden gems of coloring Designer Series Paper is how much it teaches you about color! The artists behind the paper designs make it easy to follow their lead—the images already include shading, highlights, and contrast. By coloring these designs yourself, you get a mini lesson in color theory, helping you build confidence in creating balanced and beautiful combinations.
Bonus Tip: Take It Beyond Cards
If you’re like me, you’re already dreaming up other ways to use these techniques. Stay tuned, because I’ll be sharing a future project featuring another set of these papers on a scrapbook layout. Coloring DSP isn’t just for cards—it’s perfect for layouts, gift boxes, and tags, too!
Ready to Try It Yourself?
I’d love to see how you use creative challenges to stretch your imagination. If you’re inspired to try coloring your DSP, share your results with me! And if you’re ready to get your hands on the Designer Special Release papers, you can shop them here: [SHOP WITH ME].
Let’s keep pushing those creative boundaries together. Until next time, happy crafting! 💖